ABLETM
Advanced Bindery Library Exchange
Reference
Guide
August 11, 2003
ABLEä Ventures, LLC
Copyright by ABLEä Ventures, LLC
This reference guide is copyrighted and all rights are
reserved. This document may not, in
whole or in part, be copied, photocopied, reproduced translated, reduced to any
electronic medium or machine readable form without prior consent, in writing,
from the ABLEä
Ventures, LLC.
The information in this document is subject to change without notice. The ABLEä Ventures, LLC assumes no responsibility for errors that may appear in this document.
For more information visit the ABLEä web site: http://www.programmingconcepts.com/able/
Or contact,
ABLEä Ventures, LLC
c/o Paul Parisi
ACME Bookbinding
(800) 242-1821
For technical support contact:
web site: http://www.programmingconcepts.com/able/
e-mail: able_support@programmingconcepts.com
telephone: 631-563-3800 x230
fax: 631-563-3898
ABLEä
Ventures, LLC
Acme Bookbinding
Information Conservation, Inc.
Kater-Crafts Bookbinders
Lehmann Bookbinding
Mekatronics Inc.
National Library
Binding of
Ocker & Trapp Library Bindery Inc.
Programming Concepts, Inc.
ABLEä is a
trademark of Mekatronics, Inc. / Bendror International Inc. 1987-2001
2.2.1
Pre-Defined Panel Breaks - Variables
2.2.2
Pre-Defined Panel Breaks - Font, Spacing, Placement
3
Horizontal Placements On Spine.
3.5
Horizontal Placement Rules
3.6
Horizontal Placement Examples
3.6.3
Standard Layout with New Line Characters
3.6.4
Standard Layout with New Line Characters
3.6.5
Standard Layout with New Line Characters (num_levels = 2)
3.6.6
Standard Layout with Multiple Lines
3.6.7
Standard Layout with Required Spaces (@)
3.6.8
Standard Layout with Wide Spaces (+)
3.6.9
Standard Layout with Fixed Positioning (v3.2)
4.
Placements On Front And Back
5. Vertical
Placements On Spine
5.1
Vertical Placement Examples
5.1.1
Single Line Vertical - One Panel
5.1.2
Double Line Vertical - One Panel
5.1.3
Multiple Line Vertical - One Panel
5.1.4
Multiple Line Vertical - One Panel - Longest Line Not First
5.1.5
Multiple Line Vertical - One Panel - Longest Line Not First - Special
5.1.6
Single Line Verticals - Two Panels
5.1.7
Double Line Verticals - Two Panels
5.1.8
Double Line Verticals - Two Panels
5.1.9
Multiple Line Verticals - Two Panels
5.1.10
Multiple Line Verticals - Two Panels - Special
5.1.11
Single Line Verticals - Three Panels
5.1.12
Multiple Line Verticals - Two Panels - Including Panel Break Variable
5.1.13
Multiple Line Verticals - Two Panels - Including Panel Break Variable -
Special
5.1.14
Double Line Vertical - One Panel - With Specified New Line
5.1.15 Two
Line Vertical - One Panel - Continued Line
5.1.16
Multiple Line Vertical with Vertical Line Break Character
5.1.17
Single Line Vertical Up the Spine - One Panel
5.1.18
Double Line Vertical Up the Spine - One Panel
5.1.19
Multiple Line Vertical Up the Spine - One Panel
5.1.20
Multiple Line Vertical Up the Spine - Special
5.1.21
Single Line Verticals Up the Spine - Two Panels
5.1.22
Double Line Verticals Up the Spine - Two Panels
5.1.23
Double Line Verticals Up the Spine - Two Panels Special
5.1.24
Single Line Verticals Up the Spine - Three Panels
5.1.25 Two
Line Vertical Up the Spine - One Panel - Continued Line
5.1.26
Centered Vertical - One Panel
5.1.27
Centered Vertical - One Panel - Vertical Line Break
5.1.28
Centered Vertical - Two Panels - with Normal Vertical
5.1.29
Centered Vertical - One Panel - Up the Spine
5.1.30
Centered Vertical - Up the Spine - X before U (or 6)
5.1.31
Centered Vertical - Two Panels - Down and Up spine
8. Vertical
Rules (V), (A), (P), (L), (M), (W)
8.1.1
Vertical Rule - Standard
8.1.2
Vertical Rule - Using New Lines
8.1.3
Vertical Rule - Using the Vertical New Line Character (;)
8.1.4
Vertical Rule - Changing Levels
8.1.5
Vertical Rule - Changing Levels and Using New Lines
8.1.6
Vertical Rule - Soft Hyphens
8.1.7
Vertical Center Rule - X Placement
8.1.8
Vertical Center Rule - Improper Usage of X Placement
8.1.9
Vertical Center Rule - X Placement for a Panel
8.1.10 Vertical
Center Rule - Two Panels
11. Title
Area (T) And Title Variable (U) Rules.
13.
Substitute Pitch (B) Rule (V5.0)
V6.0 Preliminary release for review.
V6.01 Changes for ABLEä release 6.01.
V6.02 Changes for ABLEä release 6.02.
V6.4 Changed copyright.
V6.5 Added new supported System 3 placements.
V6.6.1 Added Jump/Up Down Rule (J)
The ABLEä Reference Guide is comprised of multiple volumes. The collection of volumes describes the functional and operational characteristics of ABLEä. The volumes are:
|
Volume |
Reference Guide |
File Name |
|
1 |
r6-intro.htm |
|
|
2 |
Library User |
r6-library-user.htm |
|
3 |
r6-user.htm |
|
|
4 |
r6-title.htm |
|
|
5 |
R6-style.htm |
|
|
6 |
r6-report.htm |
|
|
7 |
r6-control.doc |
|
|
9 |
r6-maint.htm |
|
|
10 |
r6-transfer.htm |
|
|
12 |
R6-emboss.htm |
|
|
13 |
r6-help.htm |
|
|
15 |
r6-bill.htm |
|
|
16 |
r6-pm.htm |
|
|
19 |
R6-s3.htm |
|
|
20 |
r6-linstall.htm |
|
|
21 |
r6-binstall.htm |
|
|
22 |
r6-ezcut.htm |
|
|
23 |
r6-ftp.htm |
|
|
24 |
r6-alink.htm |
|
|
25 |
r6-zlink.htm |
|
|
27 |
r6-file-import.htm |
1. Introduction
This guide provides explanations and examples of many ABLE text composition features. Included in the style guide are:
Definition
of Panels
Standard
Horizontal Placements
Description
of Front and Back Placements
Standard
Vertical Placements
Spine
Boundary Limits
Text
Fitting Rules: C, V, P, A, F, S, U, T, I, L, M, B
Text fitting is the ability of ABLE to check that text fits within its defined boundaries. ABLE provides automatic text adjustment rules for attempting to change the text to fit into the defined boundaries. The rules are applied in the order in which they are specified in the title record or account record. ABLE attempts to use the rules until there are no more rules to try or the text fits.
Example: Condense and Vertical
Rules
Condense: The condense rule attempts to use a smaller font until there are no more fonts to try or the text fits.
Vertical: The vertical rule attempts to change a horizontal text line to a vertical text line in order to fit the text. If different vertical fonts exist, each font is attempted in the same manner as for the condense rule.
Both rules can be used to text fit a single title text; e.g., one panel can be condensed while another panel can be placed vertically in order to fit. Operations that use System 2 embossers is an exception. In this case, only one rule is applied to the entire title text.
2. Panels
A panel is a group of one or more lines of text that:
(a) should not be broken up,
(b) are treated as a block with the same characteristics,
(c) must have a minimum amount of blank space, i.e. panel separation, before and after it. (Note: The minimum amount of blank space may be zero.)
When textfitting rules are applied, they are applied to the whole panel, and only that panel. The condense for operations that use System 2 embossers is an exception to this rule. In this particular case, the rule effects the entire title text.
The following are each examples of single panels:
1. Title
<TITLE>American Journal
of
Medicine
Third Edition
2. Call
Number
<CALL>C132
17J
2.1 Panel Definition
The start and end of a panel are referred to as panel breaks. There are two types of panel breaks: Pre-Defined Panel Breaks caused by variables and Pre-Defined Panel Breaks caused by changes in font, spacing or placement.
The rules are summarized in the following paragraphs.
1. A panel is defined as the segment of a title treated as a unit for text fitting purposes (i.e. fitting and applying the rules).
2. Call Lines, Imprint Lines and Title Lines are calculated as per Note 1.
3. A panel break is defined as starting and ending with any variable, change in font, change in placement, (horizontal to vertical, front or back), and change in spacing.
4. A special character ("emb_intro") can be used to explicitly combine panels for text fitting purposes. For example, if <vol> and <year> need to have the rules applied to both panels as if they were one panel.
5. A blank variable does not cause a panel break. A blank variable is any variable that does not have characters between the beginning and ending variable characters; i.e., <> does not cause a panel break, but < > does cause a panel break.
Call numbers with embedded variables are recognized and all call number computations and processing have been changed to recognize the new call number definition.
The rules to end a call number are either:
The end of title text
The next variable label is a recognized label (title, imprint, call)
Font, level, pitch and spacing changes will not end a call number.
The consequence of these rules are to allow the correct determination of the following:
History variables
Call number line count for billing and statistics
Call number retrieval key
System 3 and GEM consecutive left-centered justify placements will emboss as expected
NOTE 1 - The title, call number and imprint panels are only defined for constructing the call number retrieval key, the text retrieval key and for counting billing lines. The fields are recognized by t, c, i, title, call, and imp. If a dollar sign ($) precedes the name, the dollar sign is ignored. The "no panel break character" may precede the name.
Examples, <C>, <call>, <t>, <t>, <imp>, <i>.
NOTE 2 - The "no panel break character" when used with the call or imp variables cause the count of line for these variables to be zero.
2.2.1 Pre-Defined Panel Breaks - Variables
Any variable accompanied by a change in font, spacing, placement or level causes a panel break. Variables accompanied by an explicit level automatically cause a panel break. The special variables (title, call, and imprint) automatically start a new panel.
If a panel break is caused by a variable, and the text is being placed vertically, the break must also be accompanied by a change of placement.
Example 1: Variable and Change in Level (2 panels)
|
F |
S |
P |
L |
Text |
|
3 |
2 |
C |
21 |
<TITLE> PC Magazine \\<VOL> Vol 7 |
Example 2: Variable and Change in Font (2 panels)
|
F |
S |
P |
L |
Text |
|
3 |
2 |
C |
2117 |
<TITLE> American Journal\of\Medicine <SUBTITLE> Third Edition |
Example 3: Variable and Change in Spacing (2 panels)
|
F |
S |
P |
L |
Text |
|
3 |
21 |
C |
2117 |
<TITLE> American Journal\of\Medicine <SUBTITLE> Third Edition |
Example 4: Variable and Change in Placement (2 panels)
|
F |
S |
P |
L |
Text |
|
3 |
2 |
CF |
2117 |
<TITLE> American Journal\of\Medicine <CALL> C132 |
Example 5: Variable and Change in Explicit Level
The following example has two panels since there is an explicit level associated with the call variable.
|
F |
S |
P |
L |
Text |
|
3 |
2 |
C |
2119 |
<TITLE> American Journal\of\Medicine <CALL> C132 |
Example 6: Special Variables
The variable CALL forces "per C132" to start a new panel.
|
F |
S |
P |
L |
Text |
|
3 |
2 |
C |
2119 |
<TITLE> American Journal\of\Medicine per <CALL> C132 |
The emb_intro variable can be used to explicitly combine panels for text fitting purposes. Any variable having the emb_intro character for the first character does NOT cause a panel break. This character only combines panels if the panel break would have been caused by the existence of a variable. It is ignored for panel breaks caused by anything else such as a change in font.
Example 7: Combining Panels Using the emb intro variable. (1 panel)
emb_intro = [!] for this example
|
F |
S |
P |
L |
Text |
|
3 |
2 |
C |
2120 |
<VOL> Vol 7 <!YEAR> 1989 |
2.2.2 Pre-Defined Panel Breaks - Font, Spacing, Placement
Pre-defined Panel Breaks caused by font, spacing or placement are changes in font, changes in spacing, or changes to and from vertical, front, and back placements.
For example:
a change from a horizontal placement to a vertical placement causes a panel break
a change from a horizontal placement to a front placement causes a panel break
a change from a vertical placement to another vertical placement causes a panel break
a change from a vertical placement to a front placement causes a panel break
A change from any placement to the 'X' placement causes a panel break. See examples for proper and improper uses of the X placement.
3 Horizontal Placements On Spine
The following placements place text horizontally on the spine:
Right (R)
Left
(L)
Center
(C)
Fixed
(1)
|
NOTE For System 2
embossers, the only valid horizontal placement on the spine is centered (C). For System 3
embossers, the (1) placement is not
valid. |
3.1 Right (R)
The right placement right justifies text on the spine; i.e., all text is aligned with the spine's right margin. The right placement centers the longest line in the panel. All other lines are right justified on the longest line.
3.2 Left (L)
The left placement left justifies text on the spine; i.e., all text begins at the spine's left margin. The left placement centers the longest line in the panel. All other lines begin at the left margin of the longest line.
3.3 Center (C)
The center placement centers text on the spine.
3.4 Fixed (1)
This position is used to do vertical embossing with any horizontal font. The cloth must be positioned so that the top of the cloth is to the left side. Embossing starts a 1/4" from the left edge.
This placement should be the ONLY placement in the title. Book measurements must be entered as follows:
1. The spine width is the actual book height.
2. The book height must be at least the sum of the actual spine width, the actual book width, and the gap.
3. The book width must be entered but is not used.
This placement is not valid for the System 3 embosser.
3.5 Horizontal Placement Rules
Text placed horizontally follows the following standard rules:
1. User specified new lines (i.e. '\' or the user defined new-line character defined in the System Parameters) are processed the same way as using the next lower level number. This does not cause a panel break. The user specified new lines represent the user defined number of levels; i.e., they are processed the same way as using a level number 'num_levels' below the current level.
2. The user specified new-line character, vert break (defined in the System Parameters), are processed the same way as using a level number 'num_levels' (defined in the System parameters) below the current level.
3. New lines of text with no level number are considered part of the previous line.
4. Text created for System 2 embossers can have only one font.
5. The user defined required space character always produces a space - even where the regular space character may not (such as the end of a line)
6. The user defined wide space character always produces the user defined number of spaces.
7. The baseline of the first line of characters is the level times the pitch.
3.6 Horizontal Placement Examples
The following are examples of some of the typical horizontal patterns that can be produced.
NOTES:
A. The font (F), placement (P), and levels (LVL) used are to make the examples easier to read.
B. The columns on the right show how the spine will be embossed on each of the supported embossers.
3.6.1 Standard Layout
|
F |
S |
P |
LVL |
TEXT |
GEM/RB7 |
SYSTEM 2 |
|
3 |
2 |
L |
20 |
LINE 1 |
LINE 1 |
Invalid S2 Placement |
|
|
|
C |
16 |
LINE 2 |
LINE 2 |
LINE 2 |
|
|
|
R |
14 |
LINE 3 |
LINE 3 |
Invalid S2 Placement |
3.6.2 Standard Layout
|
F |
S |
P |
LVL |
TEXT |
GEM/RB7/S3 |
SYSTEM 2 |
|
3 |
2 |
L |
20 |
LINE 1 |
LINE 1 |
Invalid S2 Placement |
|
|
|
C |
16 |
LINE 2 |
LINE 2 |
LINE 2 |
|
|
|
R |
12 |
LINE 3 |
LINE 3 |
Invalid S2 Placement |
3.6.3 Standard Layout with New Line Characters
|
F |
S |
P |
LVL |
TEXT |
GEM/RB7 |
SYSTEM 2 |
|
3 |
2 |
L |
20 |
THIS\IS\A\TEST |
THIS IS A TEST |
Invalid S2 Placement |
|
|
|
C |
15 |
THIS\IS\A\TEST |
THIS IS A TEST |
THIS IS A TEST |
|
|
|
R |
10 |
THIS\IS\A\TEST |
THIS IS A TEST |
Invalid S2 Placement |
3.6.4 Standard Layout with New Line Characters
|
F |
S |
P |
LVL |
TEXT |
GEM/RB7/S3 |
SYSTEM 2 |
|
3 |
2 |
L |
20 |
THIS\IS\A\TEST |
THIS IS A TEST |
Invalid S2 Placement |
|
|
|
C |
15 |
THIS\IS\A\TEST |
THIS IS A TEST |
THIS IS A TEST |
|
|
|
R |
10 |
THIS\IS\A\TEST |
THIS IS A TEST |
Invalid S2 Placement |
3.6.5 Standard Layout with New Line Characters (num_levels = 2)
|
F |
S |
P |
LVL |
TEXT |
GEM/RB7/S3 |
SYSTEM 2 |
|
3 |
2 |
C |
20 |
THIS\IS\A\TEST |
THIS
IS A TEST |
THIS
IS A TEST |
|
|
|
|
|
Note: in this example, num_levels is set to 2. therefore, each line break represents a change in two levels. |
|
|
3.6.6 Standard Layout with Multiple Lines
|
F |
S |
P |
LVL |
TEXT |
GEM/RB7/S3 |
SYSTEM 2 |
|
3 |
2 |
C |
20 |
LNS 1 2 |
LNS 1 2 |
LNS 1 2 |
|
|
|
|
17 |
LNS 3 4 |
LNS 3 4 |
LNS 3 4 |
|
|
|
|
14 |
LNS 5 6 |
LNS 5 6 |
LNS 5 6 |
3.6.7 Standard Layout with Required Spaces (@)
|
F |
S |
P |
LVL |
TEXT |
GEM/RB7/S3 |
SYSTEM 2 |
|
3 |
2 |
C |
20 |
2 SPACES\2@@REQ SP |
2 SPACES 2 REQ SP |
2 SPACES 2 REQ SP |
|
|
|
|
15 |
1 SPACE\2@@ SPACES |
1 SPACE 2 SPACES |
1 SPACE 2 SPACES |
|
|
|
|
10 |
NO SPACE NOTE: THE REQUIRED SPACE CHARACTER USED HERE IS '@' |
NOSPACE |
NOSPACE |
3.6.8 Standard Layout with Wide Spaces (+)
|
F |
S |
P |
LVL |
TEXT |
GEM/RB7/S3 |
SYSTEM 2 |
|
2 |
2 |
C |
20 |
3 SPACES |
3 SPACES |
3 SPACES |
|
|
|
|
15 |
WIDE+SP |
WIDE SP |
WIDE SP |
|
|
|
|
|
Note: The wide space character used here is '+' and the wide space width is 3 |
|
|
3.6.9 Standard Layout with Fixed Positioning (v3.2)
|
F |
S |
P |
LVL |
TEXT |
GEM/RB7 |
SYSTEM 2 SYSTEM 3 |
|
2 |
2 |
1 |
20 |
VERTICAL |
VERTICAL |
Invalid S2 Placement Invalid S3 Placement |
|
|
|
|
|
Note: The cloth is placed 90 degrees to the left when embossing. therefore, the word vertical will run vertically down the spine with a 1/4" offset from the top of the spine. |
|
|
4. Placements On Front And Back
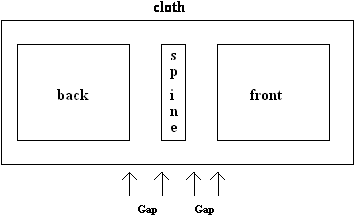
Text that is to be placed on the front cover of a book has a placement of F and text that is to be placed on the back cover of a book has a placement of B. These placements follow the normal horizontal placement rules. Text with these placements are left-justified on the correct cover.
In addition, a new placement 'H' is defined for the System 3 embosser only. Text with this placement is center justified on the front cover.
The actual placement on the front and back are computed based on the "gap" variable. The gap is defined as the space between the spine and the front and back covers that cannot be considered part of the embossing area. The gap is a system parameter.
|
NOTE For System 2 embossers, front and back are not valid placements. |
5. Vertical Placements On Spine
The X Placement
The center vertical placement is for System 3 embosser. This placement allows vertical text to be centered between a start and end level number entered. A new placement 'X' is defined to hold the end level number for centering vertical text. When using an X placement, the only other information required is the level number. Any text entered on this line will result in an error. The use of the X placement and level depends upon the direction of the vertical text, up or down the spine. See examples 5.1.26 - 5.1.31 below for more information.
The X placement may also be used for centering vertical text when using one of the vertical rules (V, A, or P). To accomplish this, an X placement would be used after a horizontal panel (The X placement itself causes a panel break). If the panel uses one of the vertical rules to text fit, the text shall be centered between the stamp level and the X level. See examples in the Vertical Rule section.
U and 6 Placements
Two new placements 'U' and '6' are defined for the System 3 embosser only. These placements place text vertically going up the spine.
Vertical Text Rules
Text placed vertically, (i.e. text that has a placement of V, 3, U, or 6) follow the following rules.
User specified new lines (i.e. '\' or the user defined new-line character defined in the System Parameters) are processed as spaces within text that is being placed vertically.
A new vertical line starts at the beginning of any line in the ABLE text area that contains a level. If there is no level, the text is considered a continuation of the text on the previous line in the ABLE text area.
The level number may not change within a panel with vertical lines. To change levels, the panel must be changed. One way to accomplish this is to change the placement.
The user specified new-line character, vert break (defined in the Systems Parameters), starts a new vertical line with the same level as the previous vertical line. This is processed the same way as using a separate text line on the text screen with the same vertical placement and level as the previous text line.
For V and 3 placements, the top (really the side) of the first character is the level times the pitch. For U and 6 placements, the bottom of the first character is the level times the pitch. For center vertical text, the level times the pitch is the start (or end if up the spine) of a panel, but not necessarily the start of the text.
For multiple line verticals, if any line after the first has a call, imprint or title variable, then the call, imprint or title panel includes the lines before the variable. Note the counting of call, imprint and title lines starts at the variable.
Any soft hyphen along with its leading and trailing spaces are eliminated.
Leading and trailing spaces surrounding hard hyphens are eliminated.
Multiple vertical line break characters are not condensed to one for System 3 and GEM embosser types. Specifying multiple vertical line break characters is now similar to the horizontal line break, where vertical line segments are separated by the number of vert breaks specified times the pitch. See example 5.1.16.
Centered vertical text is allowed for System 3 embossers. Text is centered between the start and end level entered. See examples 5.1.26 - 5.1.31 below.
5.1 Vertical Placement Examples
The following are examples of some of the typical vertical patterns that can be produced.
NOTES:
A. The font (F), placement (P), and levels (LVL) used are to make the examples easier to read.
B. The columns on the right show how the spine will be embossed on each of the supported embossers.
5.1.1 Single Line Vertical - One Panel
|
F |
S |
P |
LVL |
TEXT |
GEM/RB7/S3 |
SYSTEM 2 |
|
5 |
2 |
V |
25 |
THIS IS A TEST |
T H I S I S A T E S T |
T H I S I S A T E S T |
5.1.2 Double Line Vertical - One Panel
|
F |
S |
P |
LVL |
TEXT |
GEM/RB7/S3 |
SYSTEM 2 |
|
5 |
2 |
V |
25 25 |
THE TOP LINE IS LONGER THAN THE NEXT Note: GEM/RB7 - centered on the longest line system 2 - always starts at the same level |
T H E T H T A O N P
T L H I E N E N E I X S T L O N G E R |
T T H H A E N T T O H P E L N I E N X E T I S
L O N G E R
|
5.1.3 Multiple Line Vertical - One Panel
|
F |
S |
P |
LVL |
TEXT |
GEM/RB7/S3 |
SYSTEM 2 |
|
5 |
2 |
V |
25 25 25 |
TOP LINE IS LONGEST THEN THE NEXT SHORTEST |
T O P T H L E I S N N H E O T R H I T E S E S N L T E O X N T G E S T |
S T T H H O O E P R N T L E T I S H N T E E N I E S X T L O N G E S T |
5.1.4 Multiple Line Vertical - One Panel - Longest Line Not First
|
F |
S |
P |
LVL |
TEXT |
GEM/RB7/S3 |
SYSTEM 2 |
|
5 |
2 |
V |
25 25 25 |
SHORTEST THEN THE NEXT THIS LINE IS LONGEST |
T H I S T H L E I S N N H E O T R H I T E S E T N L E O X N T G E S T |
T T S H H H E I O N S R T T L E H I S E N T E N E I X S T L O N G E S T |
5.1.5 Multiple Line Vertical - One Panel - Longest Line Not First - Special
|
F |
S |
P |
LVL |
TEXT |
GEM/RB7/S3 |
SYSTEM 2 |
|
5 |
2 |
3 |
25 25 25 |
SHORTEST THEN THE NEXT THIS LINE IS LONGEST NOTE: THE GEM/RB7 OUTPUT ASSUMES THAT THE MODSYS VARIABLE VERT-TOP IS SET TO "Y" |
T T S H H H E I O N S R T T L E H I S E N T E N E I X S T L O N G E S T |
T T S H H H E I O N S R T T L E H I S E N T E N E I X S T L O N G E S T |
5.1.6 Single Line Verticals - Two Panels
|
F |
S |
P |
LVL |
TEXT |
GEM/RB7/S3 |
SYSTEM 2 |
|
5 5 |
2 2 |
V 3 |
25 15 |
PANEL 1 PANEL 2 |
P A N E L 1 P A N E L 2
|
P A N E L 1 P A N E L 2 |
5.1.7 Double Line Verticals - Two Panels
|
F |
S |
P |
LVL |
TEXT |
GEM/RB7/S3 |
SYSTEM 2 |
|
5 |
2 |
V 3 |
25 25 10 10 |
LINE 1 LONG LINE 2 PANEL 2 4 |
L I N L E I N 1 E L 2 O N G P A N 4 E L 2 |
L L I I N N E E
2 1 L O N G
4 P A N E L
2
|
5.1.8 Double Line Verticals - Two Panels
|
F |
S |
P |
LVL |
TEXT |
GEM/RB7/S3 |
SYSTEM 2 |
|
5 |
2 |
V 3 |
25 25 10 10 |
LINE 1 LONG LINE 2 PANEL 2 4 Note: the GEM/RB7 output assumes that the modsys variable vert-top is set to "y" |
L I N L E I N 1 E L 2 O N G 4 P A N E L 2 |
L L I I N N E E
2 1 L O N G
4 P A N E L
2
|
5.1.9 Multiple Line Verticals - Two Panels
|
F |
S |
P |
LVL |
TEXT |
GEM/RB7/S3 |
SYSTEM 2 |
|
5 |
2 |
V 3 |
25 25 25 15 15 15 |
1 LINE 2 3 LINE 4 5 L. 6 |
L I N 3 E 1 2 L L I . N 5 E 6 4
|
3 L 1 I N E 2 L 5 L . I N 6 E 4 |
5.1.10 Multiple Line Verticals - Two Panels - Special
|
F |
S |
P |
LVL |
TEXT |
GEM/RB7/S3 |
SYSTEM 2 |
|
5 |
2 |
V 3 |
25 25 25 15 15 15 |
1 LINE 2 3 LINE 4 5 L. 6 Note: the GEM/RB7 output assumes that the modsys variable vert-top is set to "y" |
L I N 3 E 1 2 L 5 L . I N 6 E
4
|
3 L 1 I N E 2 L 5 L . I N 6 E 4 |
5.1.11 Single Line Verticals - Three Panels
|
F |
S |
P |
LVL |
TEXT |
GEM/RB7/S3 |
SYSTEM 2 |
|
5 |
2 |
V 3 V |
25 17 10 |
PANEL 1 PAN. 2 PANEL 3 |
P A N E L 1 P A N . 2 P A N E L 3 |
P A N E L 1 P A N . 2 P A N E L 3 |
5.1.12 Multiple Line Verticals - Two Panels - Including Panel Break Variable
|
F |
S |
P |
LVL |
TEXT |
GEM/RB7/S3 |
SYSTEM 2 |
|
5 |
2 |
V 3 |
25 25 25 9 9 9 |
VARIABLE THAT CAUSE PANEL BREAKS MUST <CALL>ALSO CHANGE PLACE . Note: placement must be changed when a panel break variable <CALL> is used. |
V B C A R A R E U I A S A K E B L P E M A S U N S E T T L H A T P C L H A A A L C N S E G O . E |
B C V R A A E U R A S I K E B S L P E M A S U N S E T T L H A T P C A L H L A A S C N O E G . E |
5.1.13 Multiple Line Verticals - Two Panels - Including Panel Break Variable - Special
|
F |
S |
P |
LVL |
TEXT |
GEM/RB7/S3 |
SYSTEM 2 |
|
5 |
2 |
V 3 |
25 25 25 9 9 9 |
VARIABLE THAT CAUSE PANEL BREAKS MUST <CALL>ALSO CHANGE PLACE . Note: placement must be changed when a panel break variable <call> is used. Note 1: the GEM/RB7 output assumes that the modsys variable vert-top is set to "y" |
V B C A R A R E U I A S A K E B L P E M A S U N S E T T L H A T P C A L H L A A S C N O E G . E |
B C V R A A E U R A S I K E B S L P E M A S U N S E T T L H A T P C A L H L A A S C N O E G . E |
|
|
|
|
|
|
|
|
5.1.14 Double Line Vertical - One Panel - With Specified New Line
|
F |
S |
P |
LVL |
TEXT |
GEM/RB7/S3 |
SYSTEM 2 |
|
5 |
2 |
V |
25 25 |
TWO \ LINES NOT \ FOUR LINES Note: 1. New line character (\) becomes a space 2. Spaces are condensed to one space |
N O T T F W O O U R L I L N I E N S E S |
N T O W T O F L O I U N R E S L I N E S |
|
|
|
|
|
|
|
|
5.1.15 Two Line Vertical - One Panel - Continued Line
|
F |
S |
P |
LVL |
TEXT |
GEM/RB7/S3 |
SYSTEM 2 |
|
5 |
2 |
V |
25 25 |
THIS IS ONE LINE THIS IS ANOTHER LINE |
T H I T S H I I S S I A S N O O T N H E E R L I L N I E N E |
T T H H I I S S I I S S A O N N O E T H L E I R N E L I N E |
|
|
|
|
|
|
|
|
5.1.16 Multiple Line Vertical with Vertical Line Break Character
|
F |
S |
P |
LVL |
TEXT |
SYSTEM 3 GEM |
RB7/S2 |
|
5 |
2 |
V |
25 |
MULTIPLE|||VERTICAL NOTE: The vertical line break character is '|'. Each vertical line break increases the spacing between vertical lines by one pitch value. This is only valid for System 3 and GEM embossers. v4.2 and higher. |
V M E U R L T T I I C P A L L E |
V M E U R L T T I I C P A L L E |
5.1.17 Single Line Vertical Up the Spine - One Panel
|
F |
S |
P |
LVL |
TEXT |
SYSTEM 3 |
GEM/RB7/S2 |
|
5 |
2 |
U |
7 |
THIS IS A TEST NOTE: THE LEVEL NUMBER IS THE BOTTOM OF THE TEXT. HERE LEVEL 7 IS THE BOTTOM OF THE LETTER 'T' IN "THIS" |
T S E T A S I S I H T |
Invalid Placement |
5.1.18 Double Line Vertical Up the Spine - One Panel
|
F |
S |
P |
LVL |
TEXT |
SYSTEM 3 |
GEM/RB7/S2 |
|
5 |
2 |
U |
7 7 |
THE TOP LINE IS LONGER THAN THE NEXT NOTE: TEXT IS CENTERED ON THE LONGEST LINE. |
R E G N O L T S X I E N E N E I H L T
P N O A T H T E H T |
Invalid Placement |
5.1.19 Multiple Line Vertical Up the Spine - One Panel
|
F |
S |
P |
LVL |
TEXT |
SYSTEM 3 |
GEM/RB7/S2 |
|
5 |
2 |
U |
7 7 7 |
THE TOP LINE IS LONGEST THEN THE NEXT SHORTEST |
T S E G N O L T X S E T I N S E E E T N H R I T O L H N S P E O H T T E H T |
Invalid Placement |
5.1.20 Multiple Line Vertical Up the Spine - Special
|
F |
S |
P |
LVL |
TEXT |
SYSTEM 3 |
GEM/RB7/S2 |
|
5 |
2 |
6 |
7 7 7 |
SHORTEST THEN THE NEXT TOP LINE IS LONGEST NOTE: THE SYSTEM 3 OUTPUT ASSUMES THAT THE MODSYS VARIABLE VERT-TOP IS SET TO "Y" |
T S E G N O T L X E S N I
T E E S H N E T I T L R N O E P H H O S T T |
Invalid Placement |
5.1.21 Single Line Verticals Up the Spine - Two Panels
|
F |
S |
P |
LVL |
TEXT |
SYSTEM 3 |
GEM/RB7/S2 |
|
5 5 |
2 2 |
U 6 |
17 7 |
PANEL 1 PANEL 2 |
1 L E N A P 2 L E N A P |
Invalid Placement |
5.1.22 Double Line Verticals Up the Spine - Two Panels
|
F |
S |
P |
LVL |
TEXT |
SYSTEM 3 |
GEM/RB7/S2 |
|
5 |
2 |
U 6 |
17 17 7 7 |
LINE 1 LONG LINE 2 PANEL 2 4 |
G N O 2 L E 1 N I E L N I L 2 L E N 4 A P |
Invalid Placement |
5.1.23 Double Line Verticals Up the Spine - Two Panels Special
|
F |
S |
P |
LVL |
TEXT |
SYSTEM 3 |
GEM/RB7/S2 |
|
5 |
2 |
U 6 |
17 17 7 7 |
LINE 1 LONG LINE 2 PANEL 2 4 NOTE: THE SYSTEM 3 OUTPUT ASSUMES THAT THE MODSYS VARIABLE VERT-TOP IS SET TO "Y" |
G N O 2 L E 1 N I E L N I L 2 L E N A P 4 |
Invalid Placement |
5.1.24 Single Line Verticals Up the Spine - Three Panels
|
F |
S |
P |
LVL |
TEXT |
SYSTEM 3 |
GEM/RB7/S2 |
|
5 |
2 |
U 6 U |
25 17 10 |
PANEL 1 PAN. 2 PANEL 3 |
1 L E N A P 2 . N A P 3 L E N A P |
Invalid Placement |
5.1.25 Two Line Vertical Up the Spine - One Panel - Continued Line
|
F |
S |
P |
LVL |
TEXT |
SYSTEM 3 |
GEM/RB7/S2 |
|
5 |
2 |
U |
7 7 |
THE TOP LINE IS LONGER THAN THE NEXT |
R E G N O L T S X I E N E N E I H L T
P N O A T H T E H T |
Invalid Placement |
5.1.26 Centered Vertical - One Panel
|
F |
S |
P |
LVL |
TEXT |
SYSTEM 3 |
RB7/GEM/S2 |
|
5 |
2 |
V X |
20 10 |
CENTER THIS NOTE: This text is centered on the axis midway between level 20 and level 10. The X placement and level must come before any other change in placement for centering to occur. |
C E N T E R
T H I S |
NOT VALID |
5.1.27 Centered Vertical - One Panel - Vertical Line Break
|
F |
S |
P |
LVL |
TEXT |
SYSTEM 3 |
RB7/GEM/S2 |
|
5 |
2 |
3 X |
20 20 10 |
CENTER THIS NOTE: This assumes the vert_top parameter in Modsys is set to 'N'. Text is centered on the axis midway between level 20 and level 10. |
C T E H N I T S E R |
NOT VALID |
5.1.28 Centered Vertical -
Two Panels - with Normal
Vertical
|
F |
S |
P |
LVL |
TEXT |
SYSTEM 3 |
RB7/GEM/S2 |
|
5 |
2 |
V 3 X |
20 10 1 |
DOWN CENTER | THIS NOTE: This assumes the vert_top parameter in Modsys is set to 'Y' and the vertical line break character is '|'. |
D O W N T C H E I N S T E R |
NOT VALID |
5.1.29 Centered Vertical - One Panel - Up the Spine
|
F |
S |
P |
LVL |
TEXT |
SYSTEM 3 |
RB7/GEM/S2 |
|
7 |
2 |
U X |
10 20 |
UP SPINE NOTE: Text is centered on the axis midway between level 10 and level 20. The X placement must come before any other change in placement for centering to occur. However, the X placement for up the spine may come directly before the U or 6 placement. See next example. |
E N I P S P U |
NOT VALID |
5.1.30 Centered Vertical - Up the Spine - X before U (or 6)
|
F |
S |
P |
LVL |
TEXT |
SYSTEM 3 |
RB7/GEM/S2 |
|
7 |
2 |
X U |
20 10 |
UP SPINE NOTE: The X placement if used before an up the spine placement must be on the line directly above the U or 6 placement. This is only valid for up the spine. |
E N I P S P U |
NOT VALID |
5.1.31 Centered Vertical - Two Panels - Down and Up spine
|
F |
S |
P |
LVL |
TEXT |
SYSTEM 3 |
RB7/GEM/S2 |
|
5 |
2 |
V X U |
20 15 6 |
DOWN UP NOTE: What placement does the X belong to? The X placement always belongs to the vertical placement preceding it. If there is no vertical placement preceding the X, then the next line must have a U or 6 placement. Therefore, the X belongs to the V placement, and the vertical down segment is centered. The UP text is not centered.
|
D O W N P U |
NOT VALID |
6. Spine Boundary Limits
Vertical and horizontal limit tables are used to indicate a valid range of levels in which a title may begin on the spine. Different ranges may be entered into the table based on the height of the volume. The tables are then used to validate that the title is not embossed too close to or too far from the top of the spine.
|
NOTE If the table does not exist, this checking is bypassed. |
Also, an account may have special requirements for not embossing into specific areas of the spine (e.g. an inch at the bottom of the spine should never be used). The title text is checked to guarantee that it is not being placed at the bottom area of the spine (as specified as reserved in the Account record).
7. Condense Rule (C)
If text that is to be placed horizontally does not fit horizontally, and a condense rule has been requested, the condense rule is used. This rule causes ABLE to try to use the condensed font of the requested font. If one exists, it becomes the current font, and is tried. This continues until the current font has no condensed font. The condensed font is a font that has less white space between characters.
The condense rule can be specified in either the account record or in the title record.
Condensed fonts can be used as follows:
A
smaller physical font is selected automatically when the automatic text rule of
c is used.
A pseudo font can be defined based on a physical font but with smaller letter spacing.
Most ABLE users utilize the condense automatic text fit rule. Non-ABLE binderies perform this operation manually when a Title doesn't fit. ABLE allows automatic font determination to avoid manual steps.
Font definitions in the ABLE system include font size and font group. When it is desirable to use a condensed (smaller font), ABLE will select from its font tables entry specifying the font with the smaller size from the currently used font. Only fonts in the same font group will be considered.
8. Vertical Rules (V), (A), (P), (L), (M), (W)
The vertical rule has been modified to include center vertical placement for System 3 embosser types. When an X placement is used with a horizontal panel, the text will be centered vertically on the spine when a vertical rule is applied. For more information, see the Vertical Rule Examples section that follows.
There are five variations of the vertical rule: V, A, P, L and M rules.
v Places the panel causing the boundary error vertically.
a Places the panel causing the boundary error vertically only if the panel is in the title text area; i.e., not part of the call or imprint panel.
p Places the panel causing the boundary error vertically only if the panel is in the explicit or implicit title variable panel.
l Places the panel causing the boundary error vertically only if the panel is in the call area; i.e., not part of the title or imprint panel.
m Places the panel causing the boundary error vertically only if the panel is in the imprint area; i.e., not part of the call or title panel.
w Places
the panel causing the boundary error vertically. If this attempt fails and the panel is the
title variable panel, the rule attempts to split the text into multiple
vertical lines. This rule does not touch
the call panel.
If text that is to be placed horizontally on the spine does not fit horizontally, and a vertical rule has been requested, the vertical rule is used. The vertical rule can be specified in either the account record or in the title record. This rule follows the following rules.
1. User specified new lines (i.e. '\' or the user defined new-line character defined in the System Parameters) are processed as spaces within text.
2. A new line is processed as a required space, while more than one new line together are processed as a single wide space.
3. A change in level is treated as a new line.
4. Any soft hyphen along with its leading and trailing spaces are eliminated. (NOTE: The soft hyphen character is defined in the System Parameters.) A utility is provided to replace hard hyphens with soft hyphens (see the Utility volume). The utility is used to correct titles which were established before the soft hyphen was defined.
5. Leading and trailing spaces surrounding hard hyphens are eliminated.
6. If a height table is used to determine the level of the first segment in the panel and an alternate height table code is specified in modsys (via alt hts), the Alternate height table is used to determine the level of the vertical panel. NOTE: The rule is not applied if an alternate height table is specified but is invalid or does not exist. The alternate height table code only effects the current panel.
NOTE: The alternate height table code is only used if the height code is on the same row as the first character of the segment's text.
For example,
F S P LVL Text
3 2 C X Sample Title 1
F S P LVL Text
3 2 C X Sample Title 2
The alternate height table is used for "Sample Title 1", but not for "Sample Title 2".
7. The user specified new-line character, vert break (defined in the Systems Parameters), defines a new vertical line. All vertical lines created are placed at same level.
8. The font to be used is the vertical of the font requested. This font becomes the current font. Each font can have an optional vertical font associated with it. The vertical font can, in fact, have a vertical font. The vertical of the font for operations using System 2 embossers must be either "none" or the font itself. If the font itself is indicated, the vertical rule is applied.
9. ABLE always uses placement "v" for multiple line verticals caused by this rule if the System Parameters variable "vert top" is set to "Y". This guarantees that the text created is always centered around the longest vertical line in the panel. This may cause the rule to fail more often than if the variable was set to "N".
10. ABLE continues to try vertical fonts until the current font has no vertical font associated with it.
8.1 Vertical Rule Examples
The following are examples of the vertical rule.
NOTES:
A. The font (F), placement (P), and levels (LVL) used are to make the examples easier to read.
B. The columns on the right show how the spine will be embossed on each of the supported embossers.
C. The following examples assume that the text cannot fit correctly on the spine with the requested placements.
8.1.1 Vertical Rule - Standard
|
F |
S |
P |
LVL |
TEXT |
GEM/RB7/S3 |
SYSTEM 2 |
|
5 |
2 |
C |
25 |
THIS IS A TEST |
T H I S I S A T E S T |
T H I S I S A T E S T |
|
|
|
|
|
|
|
|
8.1.2 Vertical Rule - Using New Lines
|
F |
S |
P |
LVL |
TEXT |
GEM/RB7/S3 |
SYSTEM 2 |
|
5 |
2 |
C |
25 |
THIS\IS A\\TEST |
T H I S I S A T E S T |
T H I S I S A T E S T |
|
|
|
|
|
|
|
|
8.1.3 Vertical Rule - Using the Vertical New Line Character (;)
|
F |
S |
P |
LVL |
TEXT |
GEM/RB7/S3 |
SYSTEM 2 |
|
5 |
2 |
C |
25 |
THIS\IS A;SAMPLE\\TEST |
S A M T P H L I E S I S T E A S T |
S T A H M I P S L E I S
A T E S T |
|
|
|
|
|
|
|
|
8.1.4 Vertical Rule - Changing Levels
|
F |
S |
P |
LVL |
TEXT |
GEM/RB7/S3 |
SYSTEM 2 |
|
5 |
2 |
C |
25 24 25 |
THIS IS A TEST |
T H I S I S A T E S T |
T H I S I S A T E S T |
|
|
|
|
|
|
|
|
8.1.5 Vertical Rule - Changing Levels and Using New Lines
|
F |
S |
P |
LVL |
TEXT |
GEM/RB7/S3 |
SYSTEM 2 |
|
5 |
2 |
C |
25 24 11 |
THIS IS\A\\\\\\\\\\\TEST PANEL |
T H I S I S A T E S T P A N E L |
T H I S I S A T E S T P A N E L |
|
|
|
|
|
|
|
|
8.1.6 Vertical Rule - Soft Hyphens
|
F |
S |
P |
LVL |
TEXT |
GEM/RB7/S3 |
SYSTEM 2 |
|
3 |
2 |
C |
25 24 |
TEST= ING HY=\\PHENS NOTE: [=] IS THE SOFT HYPHEN FOR THIS EXAMPLE |
T E S T I N G H Y P H E N S |
T E S T I N G H Y P H E N S |
|
|
|
|
|
|
|
|
8.1.7 Vertical Center
|
F |
S |
P |
LVL |
TEXT |
SYSTEM 3 |
GEM/RB7/S2 |
|
2 |
2 |
C X |
20 7 |
THIS LINE IS TOO LONG NOTE: This text is centered between levels 20 and 7 on the spine. |
T H I S L I N E I S T O O L O N G |
Invalid |
8.1.8 Vertical Center
|
F |
S |
P |
LVL |
TEXT |
SYSTEM 3 |
GEM/RB7/S2 |
|
2 |
2 |
C X C |
20 7 19 |
THIS IS NOT CORRECT NOTE: The following assumes that the text "THIS IS" fits horizontally on the spine, but the text "NOT CORRECT" does not. "THIS IS" is at level 20 and "NOT CORRECT" is at level 19. |
THIS IS N O T C O R R E C T |
Invalid |
*NOTE:
Without the X placement, this example would show one panel of text, but since an X placement is used (X placements cause panel breaks), this example represents two panels of text. Therefore, the text "THIS IS" stays horizontal, and "NOT CORRECT" goes vertical without being centered.
The proper way to define an X placement for a panel is shown next.
8.1.9 Vertical Center
|
F |
S |
P |
LVL |
TEXT |
SYSTEM 3 |
GEM/RB7/S2 |
|
2 |
2 |
C X |
20 19 7 |
THIS IS THE CORRECT WAY |
T H I S I S T H E C O R R E C T W A Y |
Invalid Placement |
8.1.10 Vertical Center Rule - Two Panels
|
F |
S |
P |
LVL |
TEXT |
SYSTEM 3 |
GEM/RB7/S2 |
|
2 |
2 |
C X |
20 7 2 |
TITLE n<CALL>nR.123 ABCD NOTE: The X placement is grouped with the previous panel. Therefore, "TITLE" is not centered, but the call number is. This example assumes the v rule was applied. |
T I T L E R . 1 2 3 A B C D |
Invalid Placement |
9. Front Rule (F)
If a boundary error is detected and the front rule has been requested, the front rule is used. This rule causes ABLE to place the call lines on the front cover. The level of the call lines remains the same.
NOTE: The rule is not applied if any segment in the call area has a vertical placement. The front rule can be specified in either the account record or in the title record.
9.1 Front Rule Examples
The following are examples of the front rule.
NOTES:
A. The font (F), placement (P), and levels (LVL) used are to make the examples easier to read.
B. The columns on the right show how the spine will be embossed on each of the supported embossers.
C. The following examples assume that the text cannot fit correctly on the spine with the requested placements.
9.1.1 Front Rule
|
F |
S |
P |
LVL |
TEXT |
GEM/RB7/S3 |
SYSTEM 2 |
|
5 3 |
2 2 |
V C |
25 10 |
THIS IS A TEST <CALL> CALL\LINES Note: the call lines are not displayed on the spine. the front rule was applied and they were placed on the front cover. |
T H I S I S A T E S T |
T H I S I S A T E S T |
10. Switch Rule (S)
If a boundary error is detected and the switch rule has been requested, the switch rule is used. This rule causes ABLE to place the call lines on the front cover. The level of the call area is assigned the title panel's level.
If a title panel does not exist, the switch rule is applied the same as the front rule. NOTE: The rule will not be applied if any segment in the call area has a vertical placement.
If an alternate height table code is specified in the System Parameters (via alt hts), the alternate height table is used to assign the level of the call area. NOTE: The rule is not applied if an alternate height table is specified but is invalid or does not exist.
The switch rule can be specified in either the account record or in the title record.
10.1 Switch Rule Examples
The following are examples of the switch rule.
NOTES:
A. The font (F), placement (P), and levels (LVL) used are to make the examples easier to read.
B. The columns on the right show how the spine will be embossed on each of the supported embossers.
C. The following examples assume that the text cannot fit correctly on the spine with the requested placements.
10.1.1 Switch Rule
|
F |
S |
P |
LVL |
TEXT |
GEM/RB7/S3 |
SYSTEM 2 |
|
5 3 |
2 2 |
V C |
25 10 |
THIS IS A TEST <CALL> CALL\LINES Note: the call lines are not displayed on the spine. the switch rule was applied and they were placed on the front cover with the first call line at level 25. |
T H I S I S A T E S T |
T H I S I S A T E S T |
|
|
|
|
|
|
|
|
11. Title Area (T) And Title Variable (U) Rules
If a boundary error is detected and the title rule has been requested, the title rule specified is used. There are two rules:
The (u) rule causes ABLE to place the title panel variable text lines on the front cover.
The (t) rule causes ABLE to place the title area text lines (all lines except call and imprint lines) on the front cover.
NOTE: The rule is not applied if any segment in the title area has a vertical placement.
If an alternate height table code is specified in System Parameters (via alt hts), the alternate height table is used to assign a new level to the title lines. NOTE: The rule is not applied if an alternate height table is specified (via System Parameters alt hts param) but is invalid or does not exist.
The title rules can be specified in either the account record or in the title record.
11.1 Title Rule Examples
The following are examples of the title rules.
NOTES:
A. The font (F), placement (P), and levels (LVL) used are to make the examples easier to read.
B. The columns on the right show how the spine will be embossed on each of the supported embossers.
C. The following examples assume that the text cannot fit correctly on the spine with the requested placements.
11.1.1 Title Rule (U)
|
F |
S |
P |
LVL |
TEXT |
GEM/RB7/S3 |
SYSTEM 2 |
|
5 |
2 |
C |
25 23 3 |
THIS IS A TEST <SUBTITLE>MORE\TEXT <CALL> CALL\LINE Note: the title text line(s) are not displayed on the spine. The title rule was applied and they were placed on the front cover. |
MORE TEXT CALL LINE |
MORE TEXT CALL LINE |
|
|
|
|
|
|
|
|
11.1.2 Title Rule (T)
|
F |
S |
P |
LVL |
TEXT |
GEM/RB7/S3 |
SYSTEM 2 |
|
5 |
2 |
C |
25 24 22 5 |
THIS IS A TEST <SUBTITLE>
STRATEGIES <AUTHOR>M. H. MARKEL <CALL> CALL\LINE Note: the title area line(s) are not displayed on the spine. The title rule was applied and they were placed on the front cover. |
CALL LINE |
CALL LINE |
|
|
|
|
|
|
|
|
12. Imprint Rule (I)
This rule causes ABLE to place the imprint lines on the front cover. If a boundary error is detected and the imprint rule (I) has been requested, the imprint rule is used. The level of the imprint lines remain the same.
NOTE: The rule is not applied if any segment in the imprint area has a vertical placement.
The imprint rule can be specified in either the Account record or in the Title record.
12.1 Imprint Rule Examples
The following are examples of the imprint rule.
NOTES:
A. The font (F), placement (P), and levels (LVL) used are to make the examples easier to read.
B. The columns on the right show how the spine will be embossed on each of the supported embossers.
C. The following examples assume that the text cannot fit correctly on the spine with the requested placements.
12.1.1 Imprint Rule
|
F |
S |
P |
LVL |
TEXT |
GEM/RB7/S3 |
SYSTEM 2 |
|
5 3 |
2 2 |
V C |
25 10 |
THIS IS A TEST <IMP> IMPRINT\LINES Note: the imprint lines are not displayed on the spine. The imprint rule was applied and they were placed on the front cover. |
T H I S I S A T E S T |
T H I S I S A T E S T |
|
|
|
|
|
|
|
|
|
|
|
|
|
|
|
|
13. Substitute Pitch (B) Rule (V5.0)
A Bunch (B) rule change pitch to bunch lines closer together. The rule applies to all embosser types. The starting level of the panel and all subsequent panels remain unchanged. The pitch will be substituted for the next pitch until the panel text fits successfully.
The rule changes (substitutes) the pitch used to text
fit a panel based upon the pitch table in the account record. The order of the pitch codes in the account
pitch table will indicate the order of substitution; top down, left column then
right column. The update utility can be
used to reorder the pitch table.
Note: the account record pitch table now has two uses: (a) to validate pitch values, and (b) to provide the order for pitch substitution. This means that all pitch values in the table are candidates for substitution.
14. Jump/Up Down Rule (J)
The Jump/Up Down
rule (J) is used in cases where two panels overlap. Using this rule, a panel is either moved up
or down until a successful fit or until the limits specified in a limit table
or spine boundary are reached. This rule
is most useful when a vertical panel overlaps a horizontal panel.
15. Consequences Of The Rules
While the condense and vertical rules are applied only to the current panel causing the boundary error, the front/switch, title, and imprint rules are applied to all call lines, all title text lines, and all imprint lines, respectively; i.e., these rules may span panels. There are consequences to this.
For example, suppose the rules to be applied to the following title is "CT".
|
F |
S |
P |
L |
Text |
|
3 |
21 |
C |
2018 |
<TITLE> THE TITLE IS TOO WIDE <SUBTITLE> THE SUBTITLE IS EVEN WIDER |
Both panels are considered title text. The first panel contains the text "THE TITLE IS TOO WIDE" and the second, "THE SUBTITLE IS EVEN WIDER". Neither line fits on the spine. Therefore, ABLE attempts to condense the first panel.
Let's assume that the condense rule worked. Now, ABLE tries to condense the second panel. However, this panel still does not fit on the spine. Then, ABLE applies the next rule; i.e., the title rule. This rule places both panels on the front cover.
It is important to note that since the first panel was previously condensed, it is placed on the front cover in a condensed font. To guarantee that both panels have the same font, the user must use the no panel break character to explicitly combine the panels. This identical scenario can also happen when applying the front, switch and imprint (v3.2) rules.
16. Line Counting
The text block is divided into three areas:
Title Area
Call Area
Imprint Area
An area is a group of lines (or segments). Each segment in the text block belongs to ONLY one area listed above. Note, an area may be empty; i.e., there may be no lines within an area.
If the first segment in the text block is NOT part of the call or imprint area, the title area begins at the first segment. If the first segment is part of the call or imprint area, the title area begins at the segment containing the title variable.
The call area begins at the segment containing the call variable.
The imprint area begins at the segment containing the imprint variable.
The following line counts are generated:
Number of Horizontal Title Lines
Number of Vertical Title Lines
Number of Call Lines
Number of Imprint Lines
The number of horizontal title lines is the number of horizontal title lines in the title area. The number of vertical title lines is the number of vertical lines in the panel in the title area with greatest number of vertical lines.
NOTE: the vertical line count for billing purposes may be modified depending on the class of binding. Refer to the Class Codes section of the Maintenance volume of the ABLE Reference Guide for additional information about vertical line counting.
The number of call lines is the number of horizontal lines in the call area plus the number of vertical lines in the panel in the call area with the greatest number of vertical lines.
The number of imprint lines is the number of horizontal lines in the imprint area plus the number of vertical lines in the panel in the imprint area with the greatest number of vertical lines.